
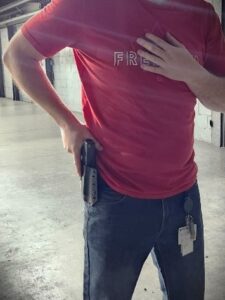
Once a threat is identified and you have decided to draw and shoot, orient your stance toward the threat and begin the draw sequence. Quickly, your dominant hand moves to establish a proper grip on the pistol—the only opportunity to secure a correct grip right out of the gate. Position the web of your dominant hand as high as possible on the backstrap, which curves beneath the rear of the slide. Extend your trigger finger straight alongside the frame, then close the grip with your three lower fingers. (See Figure 1.)
If necessary, use your trigger finger to activate the push button release on level 2 retention holsters at this time. Your thumb may also disengage the thumb break before you finish forming the grip and begin pulling the pistol from the holster, whether it is a level 2 or level 3 retention model.
Meanwhile, bring your support hand to the body’s centerline, open with fingers extended and joined, angled approximately 45 degrees downward, ready to receive the pistol. Throughout this process, move only what is necessary to complete each step.
Economy of motion and effort are critical to executing the draw quickly and efficiently. Once you have mastered this sequence, it can be performed at maximum speed without sacrificing accuracy, as it primarily involves gross motor skills rather than fine motor control.
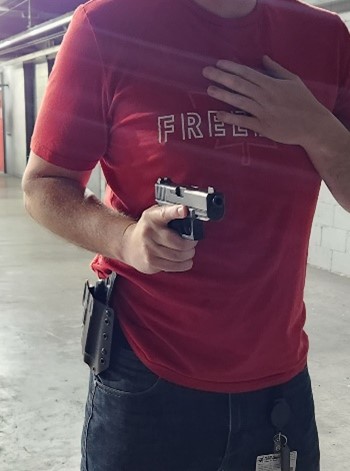
With your dominant hand securely gripping the pistol, draw the weapon from the holster. As soon as the pistol clears the holster, immediately point it in the direction of the threat (see Figure 2) or bring it toward the centerline of your body to meet your support hand. When both hands come together, this is known as the “marriage.”
At this stage, your trigger finger can begin to take up slack in the trigger if you anticipate firing from retention or engaging a close-range advancing threat. Once the muzzle is directed at the threat, you may disengage the safety if the pistol is equipped with one.
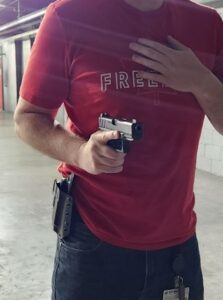
As you transition to position three, align the pistol under your dominant eye to facilitate faster sight acquisition, focusing on the front sight (refer to Figure 3). Like the previous steps, this movement should be executed as quickly as possible once properly trained.
It is also crucial to understand the concept of eye dominance and whether you are right- or left-eye dominant. Approximately 95% of people share their eye dominance with their strong hand—that is, right-handed individuals are typically right-eye dominant, and left-handed individuals are generally left-eye dominant. The remaining 5% are cross-eye dominant, meaning a right-handed person may be left-eye dominant, or vice versa. This understanding plays a key role in sight alignment and target acquisition during the draw.
Your dominant hand completes the two-handed grip while the muzzle remains directed toward the threat (see Figure 3). At this stage, your finger remains off the trigger unless you intend to initiate firing. If the threat is close, you may begin to engage from this position as you complete your presentation. This is the preferred ready position, with your finger safely off the trigger.
Maintain a semi-relaxed upper body, avoid tensing your shoulder muscles. Also, keep your head naturally erect or slightly tilted forward, but remain comfortable and avoid hunching.
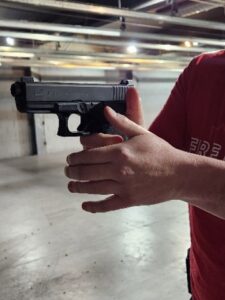
Note: The transition from position three to four—pressing the hands and pistol forward—should be executed at a moderate pace, allowing sufficient time to take up trigger slack and acquire a proper sight picture. Smoothness is essential here: trigger press, movement, sight alignment, and sight picture must come together in harmony at full extension to deliver a well-placed shot.
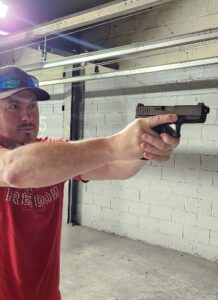
This position is known as full presentation, and it is where your most accurate shooting occurs (see Figures 4 & 5). If time allows, take a moment to review your shooting fundamentals before taking the shot. Once the engagement is complete, remove your finger from the trigger only if the threat has been neutralized. If the engagement is ongoing and follow-up shots are necessary, remember to maintain proper trigger reset during your follow-through.
Beyond the Paper: For law enforcement officers, military personnel, and lawful concealed carriers, after firing in position four, it is essential to develop the habit of scanning and assessing your surroundings. Lower your muzzle one to two inches and utilize both eyes as you turn your head to scan left, right, and back to center. This broad visual sweep helps break the tunnel vision commonly experienced during high-stress encounters and aligns with the O.O.D.A. loop (Observe, Orient, Decide, Act).
When returning the firearm to position three, check the firearm’s condition, ensure it is fully in battery, then safely de-cock and engage the safety if equipped. Conduct a quick shoulder check to assess your rear area; this readiness prepares you to respond if you must turn and re-engage.
To rest, return to the low-ready position or back to position three of the draw cycle.
Practical Pistol Shooting provides valuable real-world insights for anyone who carries a concealed pistol for self-defense, emphasizing tactics that go beyond basic marksmanship.

After all, it is the foundation on which IDPA is built on. Build your foundation on solid fundamentals and follow these tips to improve your training.
See you on the Range!